Thursday, January 19, 2017

Chunky Chili

Hi everyone:

Today's a chilly day so although I don't have my usual ingredients for my basic chili I'm using what I have in my pantry.

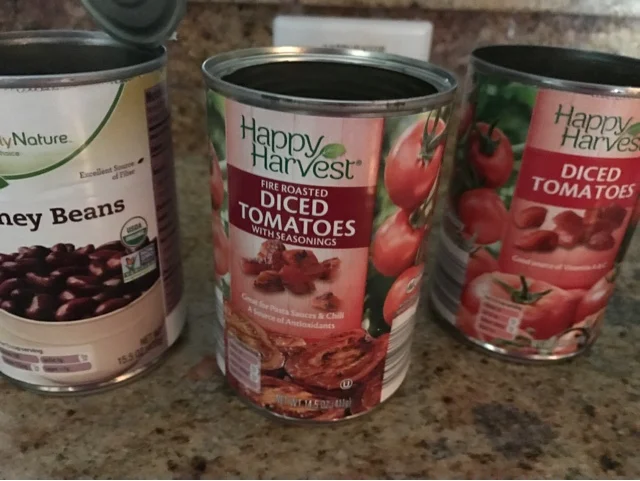
I love Aldi's and use a lot of their products.  When I was there last week I bought several cans of diced tomatoes just in case.  I do a lot with diced tomatoes. they are really useful in a lot of recipes.

Years ago I probably would have never picked up a can because the kids and hubby didn't like chunky sauce.  I wish I hadn't succumbed and gave in because they really make a great add in to so many meals and you can't get good fresh tomatoes all year.

Today's recipe consisted of 

1 1/4 lb. ground beef
1 medium diced onion
1-15 oz. can fire roasted diced tomatoes
1 - 15 oz. can diced tomatoes
2 T chili powder
1 -15 oz. can dark kidney beans drained and rinsed
salt and pepper

I browned my meat and onion in approximately 2 T olive oil with some salt and pepper.  Cook it until all meat was light brown in color.  I then drained any visible fat drippings, add your tomatoes and chili powder.  Cover slightly and simmer until tomatoes start to cook a little.  Add drained kidney beans and cook approximately 1/2 hour.


Happy Cooking from my kitchen to yours,


Wednesday, January 18, 2017

Baked Chicken with Salsa and Cheese

Hi everyone,

I've been making very easy recipes for the last week and today I'm on another roll.

My newest passion in the line of yummy ingredients is Salsa...................It is a go to save when you don't know what to make.  It has everything in it to make a yummy meal.  Of course you must like salsa.  My newest love is Mango/ peach salsa.  Costco sells a huge jar and besides using it for a party dip it really adds a lot of flavor to most meats.


Last week I used it in my crockpot with pork chops and our meal was fabulous.  Now I'm using it with boneless thin chicken breasts and baking them. I think the list can go on with this fabulous salsa.

**Just a note about this particular dish. I ate it for the first time at a friends and couldn't wait to make it again. She likes to make easy meals too!!!

Here's what the recipe consisted of:

2 lb. boneless skinless chicken breasts
pinch of salt and pepper
2 cups salsa or more
shredded mild cheddar cheese

In a 9 x12 or larger  baking dish place some of the salsa.  Layer your chicken. Top with more salsa.

Bake 350 degrees about 20  to 30 minutes. Remove from oven.  Top with cheese and bake approximate 10 minutes more or until cheese has melted.

Serve with a few sauteed fresh veggies and wow you have a light healthy and delicious quick meal.


Friday, January 13, 2017

Crockpot Balsamic Pork Tenderloin

Mashed potatoes and fresh homegrown tomato with red onion.  YUM


I had lots to do today and it was a day I didn't want to take the time to fuss so yep it was a crockpot kind of day.

Off to an appointment in the a.m. and then to help with a project at our clubhouse so this was the ideal time to try a new recipe.  Quite honestly I don't know where it came from but I did have another recipe that I made ages ago so this one is different.  The other recipe you used cranberry sauce in it.  This one you do not.


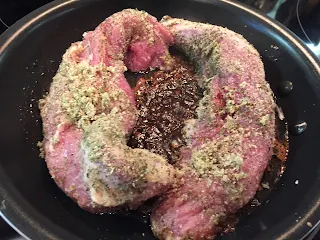
First  Putting the rub was no trouble at all since I had all the necessary spices and had got a good deal on pork tenderloin (buy one get one free). Can't beat that.  Two tenderloins in a package and the recipe called for 2 lbs. of pork tenderloin so I was good to go!


The pork was prepped in literately 3 minutes and into the crockpot to cook for 3 hours on high.

Here is the recipe for you to enjoy!  I adapted it slightly to what I had available as far as spices and it was delicious.  I served it warm but no problem making a cold sandwich with this.  It is perfect!

1 tsp. dried thyme
1tsp. pepper
1 tsp. salt
3 T dried minced onion
1 T olive oil
1/2 cup balsamic vinegar divided
2 cloves minced garlic
2 lb. pork tenderloin


Mix the first five ingredients together in a bowl.  Rub or roll the tenderloin or tenderloins in the dry mixture.

In a large pan place oil, 1/4 cup balsamic vinegar and garlic.  Heat over medium heat until starts to sizzle.  Add pork to pan and sear on each side to brown.

Lower heat.  Transfer pork to crockpot.

Pour remaining balsamic into pan and continue to stir for a few minutes to de-glaze pan.  Pour juices over tenderloin in crockpot.

Cook on high for approximately 3 hours.  Mine was done in that time and perfect.


I took the pork out of the crockpot and let rest for five to ten minutes so that it will slice easily.  I use a serrated knife.

Serve or return slices to crockpot where you can keep the pork warm in the juices. Lots of juice or if not enough, add a little water and stir.  I drizzed some over my potatoes....YUMMY

9/10/15


Tuesday, January 10, 2017

Me


This is a post from last year.  I started the WW program years ago  and bought the cookbook.  I still have managed to stay close to my original goal. Off by 4 lbs. That's ok though. 

 I'm not working at it but do work at staying focused on what I eat.  I eat everything but know my food weaknesses so try to moderate the amount when I eat them.  I buy small bags of chips which I like and candy.  Eat snacks by one handful.....that's it.  I don't go back for more like I used to. I keep to this promise and have since 2001.

I don't exercise which I should by just walking a few days a week or doing some weights so if you want to stay toned doing something like Curves worked for me.  I did it for 5 years and I definitely felt better.  I had a exercise program that worked for me.  You have to have one that works for you!

I intend to get weighed in next week when I feel better so I'll let you know how I did.  I am a lifetime member which also helps keep me on track.  In 2001 I lost over 30 lbs. and have kept it off.  I have gone up as much as 10 lbs. but give myself a pep talk lol  when that happens and I get myself back on track.

I do have many WW recipes on my blog.  This is one. Remember that it's the portion you eat and that keeps you in control.  Be aware of what goes in your mouth because every extra spoonful counts.  It's not easy but it can be done.  Keep in mind that most of all you want to be healthy...............It's the most important reason to keep at a healthy weight.

I didn't mean to go on with this post but there must have been a reason to give a pep talk....not intentional but sincere.. xo

P.S. Please note this is not a WW or Curves advertisement. As you know I don't post advertisements.  These two worked for me because I was ready to do something to make me healthier.

Love and stuff,M.j.


Another Coconut Macaroon Recipe


Once again I am trying to put together a copykat recipe for macaroons.  Unfortunately as good as these are and as good as all my recipes for macaroons have been (ALL FIVE) I just can't seem to nail my original recipe.  I'll keep working on it until I have exhausted all my avenues.  I will not give up!  I am looking for a light macaroon type cookie.  Lightly sweetened and soft.  

INGREDIENTS:

  • 2/3 cup flour
  • 5 1/4 cups shredded sweetened coconut
  • 1/2 teaspoon salt
  • 1 (14 ounce) can sweetened condensed milk
  • 2 teaspoons vanilla extract
  • 1 teaspoon almond extract ( I didn't add any almond extract but would have but I was out of it)
  • 4 ounces white or semi-sweet baking chocolate or a combination of both (or almond bark)

DIRECTIONS:

  1. Preheat oven to 350°F. Line cookie sheets with parchment paper
  2. Stir flour, coconut, and salt. Stir in sweetened condensed milk and both extracts. Stir until combined.
  3. Drop 2 tablespoon balls of dough onto the prepared cookie sheets. These do not spread so you can crowd them close together. Wet your hands slightly and push down any sticking up or out single pieces of coconut as these might burn.
  4. Bake for about 11 minutes, until the bottoms are golden and the tops start to turn the tiniest bit golden. Cool completely before eating or dipping.
  5. To dip: melt chocolate according to package directions. I like to melt my chocolate on 50% power in 30 second increments, stirring after each, until it’s melted and smooth. Add a teaspoon of vegetable oil or crisco if needed to get it to melt smoother. Dip the bottoms or tops of each macaroon in chocolate. Let dry. Tip: don’t refrigerate or you’ll get the condensation marks!

I did not coat these macaroons with chocolate.

Less fuss still yummy!

Happy Baking from my kitchen to yours,