On Saturday we had a social at our clubhouse and it's always a pot luck meal for the evening or a brunch casserole for the morning. Lots of food and great conversation makes for a very nice event.
I knew about this social for some time so when I was grocery shopping I picked up some fresh raspberries and thought I'd make a brunch favorite which is bread pudding. Adding raspberries will make it wonderful.
4 cups dried bread cubes ( I used crusty Italian)and broke up bread in pieces and allowed to dry overnight.
1/2 to 1 cup sugar( depends on how sweet you want it to be.)
4 eggs
2 cups whole milk
2 tablespoons butter softened
2 tsp. pure vanilla
Whisk milk, eggs, sugar, vanilla. Add melted butter.
Note: To blend together better, I put all ingredients except bread and raspberries in blender and blended on low speed.
Slightly grease a baking dish with butter. (I used a square 9x9 baking dish)but you can use 13 x9 inch baking dish easily.
Place half of dried bread cubes in buttered 9x13” dish, place raspberries over bread trying to spread them evenly and then add the remainder of dried bread to the top. Push down of bread slightly.
Slowly pour liquid ingredients over bread cubes and allow to set for 10 minutes so bread can soak up some of the milk. Push down on bread to make sure all liquid covers bread.
Sprinkle a little cinnamon on top.. Bake 350 degrees until set, about 40 to 45 minutes.. Check after 30 minutes with knife in center.. If it comes out clean it is ready if not place in oven for remainder of time.
Note: Depending on oven temperatures and size of pan time varies.
Serve warm.
Dust with powdered sugar or serve with maple syrup. Oh so yummy!
A great cake for a party or graduation. Serves a lot of people. Enjoy!
Comfort food big time!
I remember long ago when Tastycake cupcake company came out with the now famous Tandy cake cupcake. We all loved those cupcakes and still do after many many years. White cake with lots of peanut butter on top and then coated with milk chocolate. OH how we loved and still love that cupcake!! I remember warming them slightly in the microwave so the chocolate would start to melt. Do you have any of those memories? I think if you have never tried a recipe like this today or this week would be a great time to make some food memories.
Today I decided to make the sheet cake version of that cupcake. It's been a favorite from long ago and I thought you may like to make this for the family. Warning!!!!! It is addicting! Yum!
1 large cookie sheet (greased lightly)
1 cup milk
4 T margarine or butter(I like butter)
Warm milk, margarine and set aside to cool
Blend well in mixer:
4 eggs
2 cups sugar (I cut back to 1 1/2 cups)
1 tsp. vanilla
1/2 tsp. salt or a little less
Add 2 cups flour, 2 T baking powder to above while adding milk mixture slowly to blend. Beat until soft. Mixture will be runny.
Pour into greased cookie sheet and bake at 350 degrees for 15 to 20 minutes or more depending on your oven. Use the toothpick in center test.
Note: Cool 10 minutes before placing softened peanut butter on cake.
 |
| Last layer "Chocolate"! |
While cake is baking place approx. 12 oz. creamy peanut butter in a measuring cup and place in microwave to soften, approx 30 seconds.
Stir peanut butter until it looks soft enough to spread. Spread on slightly cooled cake and refrigerate until set. Remove from refrigerator and top with melted chocolate*.
*Place(2) two 8 oz. Large broken in pieces Hershey Bars in microwave and melt stirring occasionally to soften enough to spread on top of peanut butter. Refrigerate until ready to serve. Allow to set out of refrigerator a few minutes before slicing. Cut in pieces.
Note: Chocolate candy topping hardens so allowing cake to set for several minutes is a good idea. I actually enjoyed the cake before I refrigerated it. Just sayin :)
5/5/15
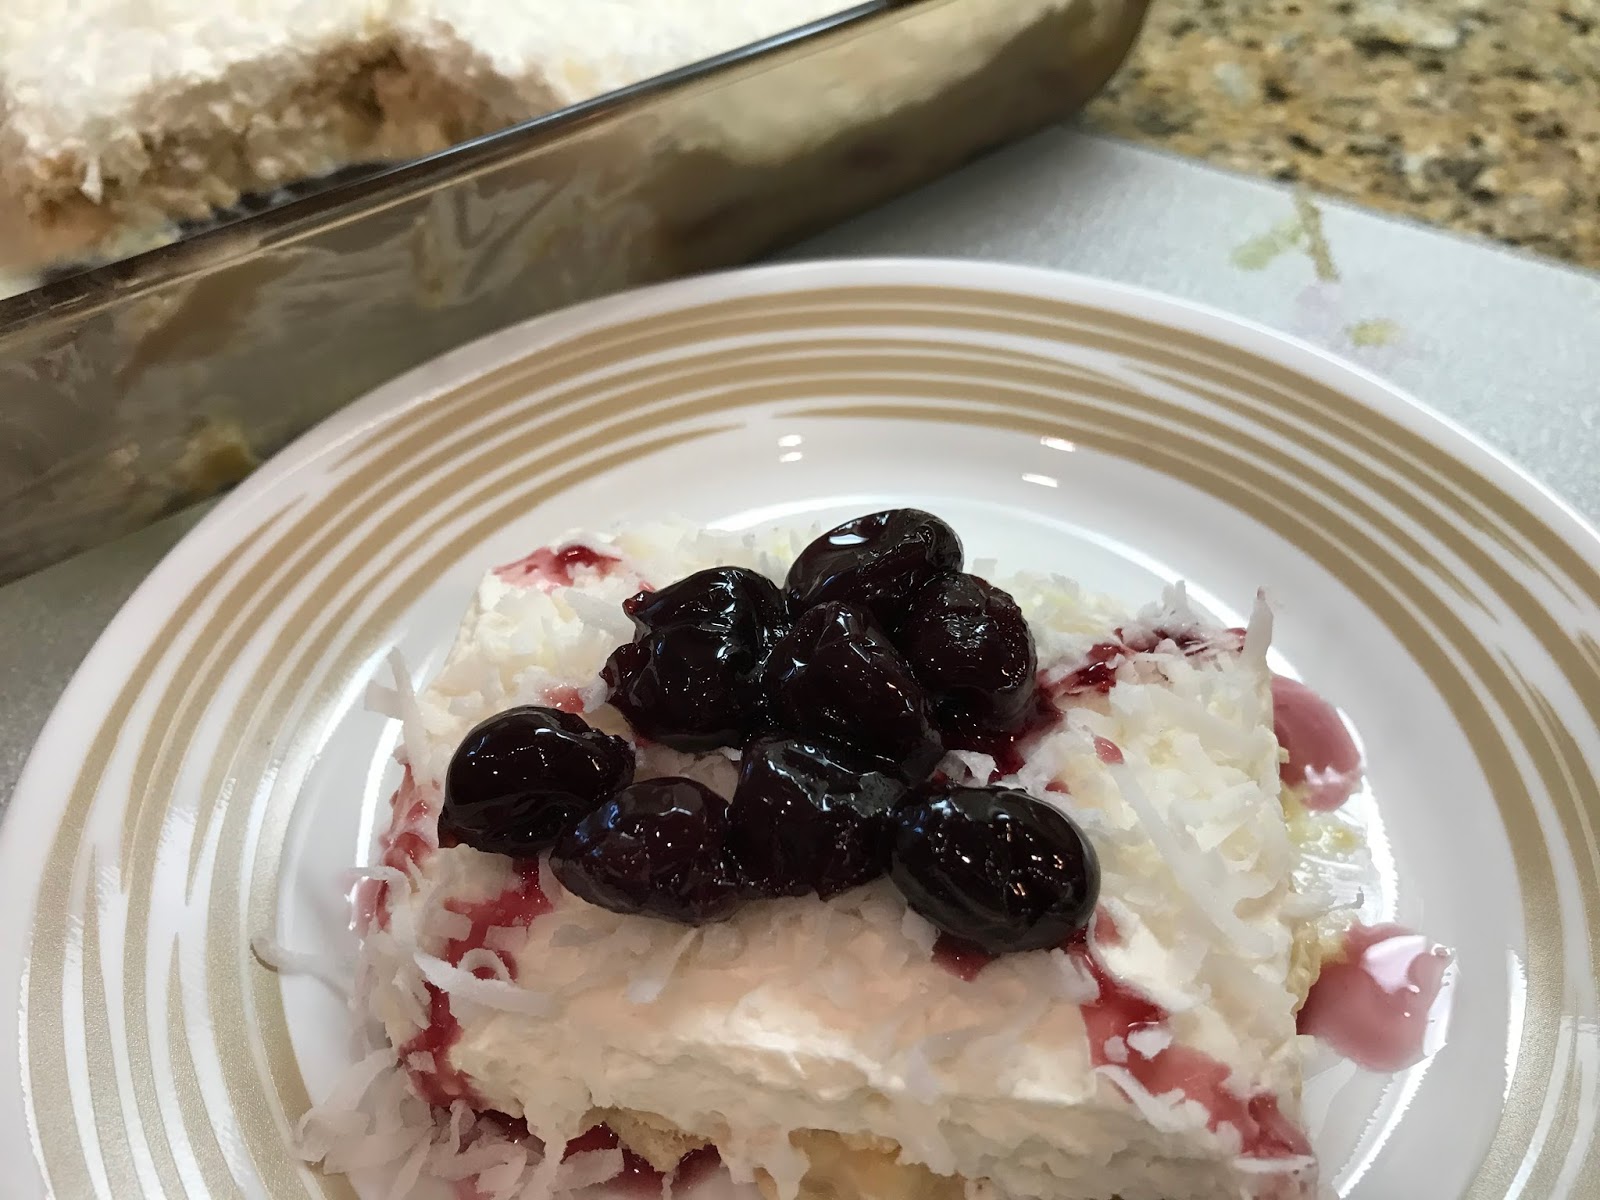
A very nice, easy dessert that is great for summer. Loaded with pineapple and topped with whipped cream and coconut this is one dessert that everyone will enjoy and you don't have to spend hours preparing and baking. No baking required.
I made this before I went to bed last night and it was perfect for serving today. It isn't rich, but light to the tastebuds so a nice piece will definitely be enjoyed. Happy NO BAKE dessert!
1 box vanilla wafer cookies (Nilla Vanilla type wafers)
1-20 oz. can crushed pineapple with natural juice
1/4 cup lemon juice
1 can sweetened condensed milk
1 package coconut
8 oz. drained maraschino cherries or as I used Bing cherries( save a little juice to drizzle)
1 pint heavy whipping cream(you can use Cool whip) but freshly whipped cream makes it so good..
1/2 cup chopped pecans(optional)
In a large bowl place crushed pineapple(juice too), condensed milk and lemon juice. Stir well.
In a medium bowl beat whipping cream with 1 tsp. vanilla and 1/4 cup confectionery sugar until it forms soft peaks.
In a 13 x9 inch glass pan place half box of wafers. Slowly pour half of pineapple mix over wafers. Add the other 1/2 box of wafers of top and push down gently the wafers into the liquid. Top with whipped cream and coconut and refrigerate several hours but preferably overnight.
Top with a few cherries when serving.
Enjoy!
In my quest to not change the taste of my Biscotti and texture today I decided it was a good day to experiment with my original recipe I had posted when I started blogging.
I cut the sugar in half of what the recipe called for and today trying to cut fat I used 1/2 butter and 4 oz unsweetened applesauce . I flavored them as I usually do and added chopped almonds and cranberries to some.
Use my Almond Biscotti recipe in labels.https://iliketobakeandcook.blogspot.com/2018/11/almond-biscotti-my-favorite.html
The result! Not as sweet and a little more dense than my original but with coffee or alone (hubby ate loads) they are fine and maybe it'll take a bit of the guilt away from overindulging..
Happy Baking from my kitchen to yours,
1/8/16
1//3/12
Whenever possible I try to make homemade and these easy Italian Chicken Patties can easily be made for your family.
I know store bought packages are convenient but you can make these healthy convenient chicken patties too. Combining these easy ingredients and making your own patties you can freeze several to keep on hand for later too!
Note: These patties can be easily topped with your favorite red sauce, onions and peppers, sliced cheese or just about any topping you would like. **** A great sandwich on a crusty roll or meal. You choose!
Today I am making them and freezing them so when I'm busy I'll have something healthy and tasty to quick serve. You can easily defrost them in the refrigerator overnight for your meal or microwave on defrost and quick fry in canola or olive oil. Why not double the recipe and wrap and freeze some for your family?
Ingredients:
1 lb. ground chicken
1 egg
1/2 cup breadcrumbs (plain or seasoned)
1/2 cup grated Italian cheese
1 tsp. salt
1/2 tsp. pepper
1/2 tsp. Italian seasoning
1 tsp. dried parsley
1/2 tsp. onion powder
1/4 tsp. garlic powder
Mix all ingredients in a large bowl. If your mixture is dry add a tablespoon or two of water. My chicken was very moist so I did not need to add any liquid.
Using a large Tablespoon or as I do an ice cream scooper, scoop into large balls and shape to either round or oval shape. Saute slowly in slight amount of olive oil until lightly browned and center is no longer pink. Serve with salad, pasta, veggies or top with peppers and onions for a light lunch. 1 lb. made approx. 8 to 9 average size patties.
Happy Cooking from my kitchen to yours,
12/11/12
1/7/13


